
Understanding Routed Network Policies in vRealize Automation
The next type of Network Policy we want to talk about is called Routed Network Policy. If you have worked with vRealize Automation 7 before, you might notice that Routed Network Policies correspond to Routed Networks in vRA 7.
Hence you use a routed network policy when there is a need for end-to-end routable access with unique IP addresses. When deploying a blueprint with a routed network policy referenced, vRealize Automation will instruct NSX to connect the newly created network to the existing DLR and configure the DLR in such a way that the newly created network is routed to the upstream gateway.
Hence, vRealize Automation dynamically creates a network with different subnets and a routing table. Routed networks are a valid choice if there is end-to-end routable access with unique IP addresses needed.
IP Address Assignment in Routed Networks
Routed network polices support static and dynamic IP address assignment. If you prefer static IP address assignment, consider the following items to be configured.
Guest customization specification – IP addresses will be assigned using the guest customization specification. Without configuring this, IP addresses will be reserved from the pool, but they will not be applied to the provisioned machine.
VMware tools – behind the scenes, the configuration of virtual machines with new IP addresses happens with the VMware tools. Dynamic IP address work as well. In this case, there will be a DHCP server for the newly created subnet.
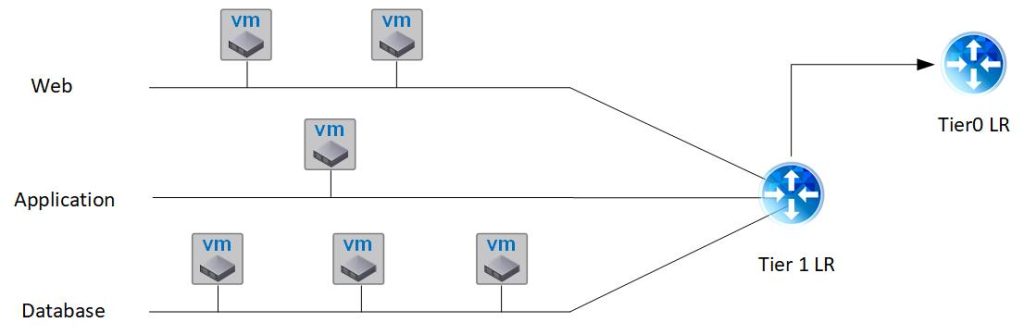
A routed network can be depicted as follows:
Configuring a Routed Network Policy for Network Connectivity
In order to configure a routed network policy, there are a couple of steps to be done:
First, a network profile must be created. We have shown this in the blog post before, so will skip the instructions here.
Second, make sure, there is a network with a routable network range configured if you want to have external network connectivity (Tier0 LR).
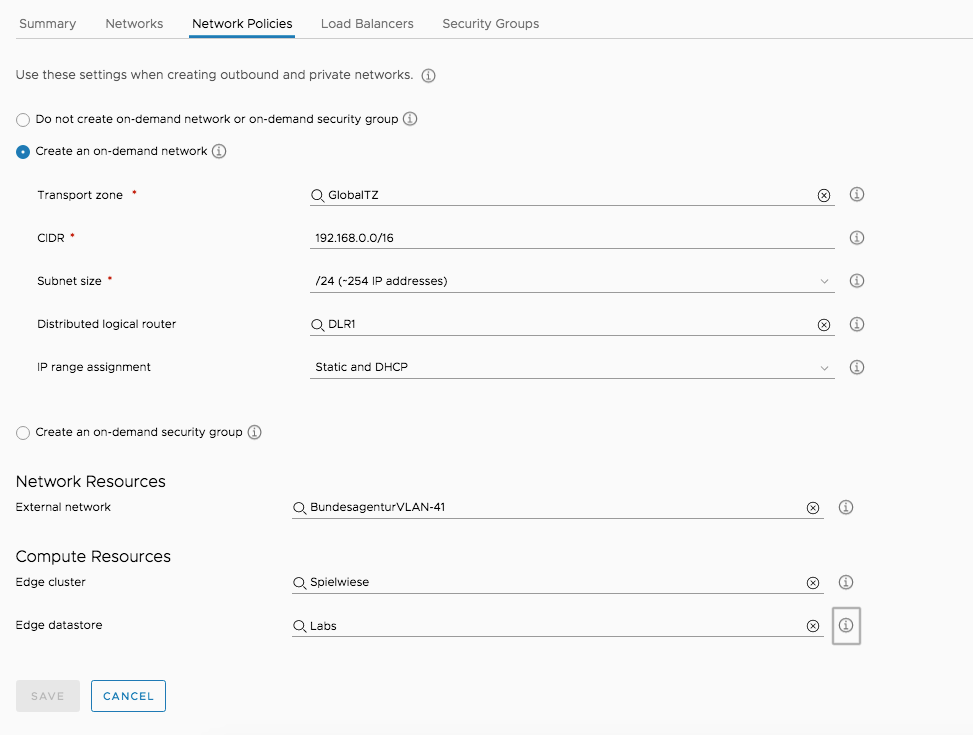
Next, on your network profile change to the Network Polices tab and perform the following configuration:
- Select „Create an on-demand network“
- Choose a transport zone (A transport zone controls which hosts an NSX logical switch can reach to. It can span one or more vSphere clusters. Transport zones dictate which clusters and, therefore, which virtual machines can participate in the use of a particular network)
- Provide a CIDR range: The network address range to be used during provisioning to create isolated subnets. The CIDR address should be large enough, for example 192.168.0.0/16, to create multiple isolated subnets in a deployment.
- Specify the Subnet size. For example a /24 network provide 256-2=254 IP addresses.
- Specify the Distributed Logical Router
- Define the IP range assignment:DHCP (dynamic) – Uses the allocated CIDR to configure an IP pool on a DHCP server. All the IP addresses for this network are dynamically assigned.Static – Uses the allocated CIDR to statically allocate IP addresses. Use this option when no DHCP server is configured for this network.Static and DHCP – Using the CIDR and Subnet range settings, the DHCP server pool is configured to support half of the address space allocation using the DHCP method and half of the IP address space allocation using the Static method. Use this option when some of the machines connected to the on-demand network require assigned, static IPs and some require dynamic IPs.
- External network
- Edge cluster: Identifies the edge cluster or resource pool where the edge appliance is to be deployed.
- Edge datastore: Identifies the edge datastore used to provision the edge appliance.
Once, this has been done, we can continue with configuring a blueprint. The following code snipped shows how to setup a blueprint that uses a NSX network of type „routed“.
formatVersion: 1
inputs:
name:
type: string
title: VM Name
description: Name of the virtual machine
resources:
Cloud_Machine_1:
type: Cloud.Machine
properties:
flavor: small
image: Ubuntu1804
cloudConfig: |
#cloudconfig
repo_update: true
repo_upgrade: all
package_update: true
package_upgrade: all
hostname: ${input.name}
manage_etc_hosts: true
networks:
- network: '${resource.Cloud_NSX_Network_1.id}'
name: Ubuntu
Cloud_NSX_Network_1:
type: Cloud.NSX.Network
properties:
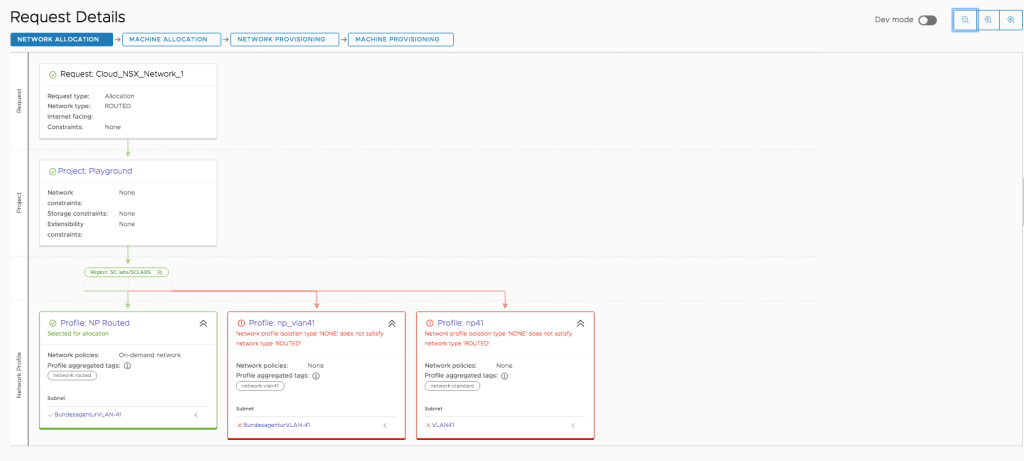
networkType: routedOnce provisioned the deployment can be visualized as follows:
If you go to the Deployment overview, you can see the created on-demand networks as well.